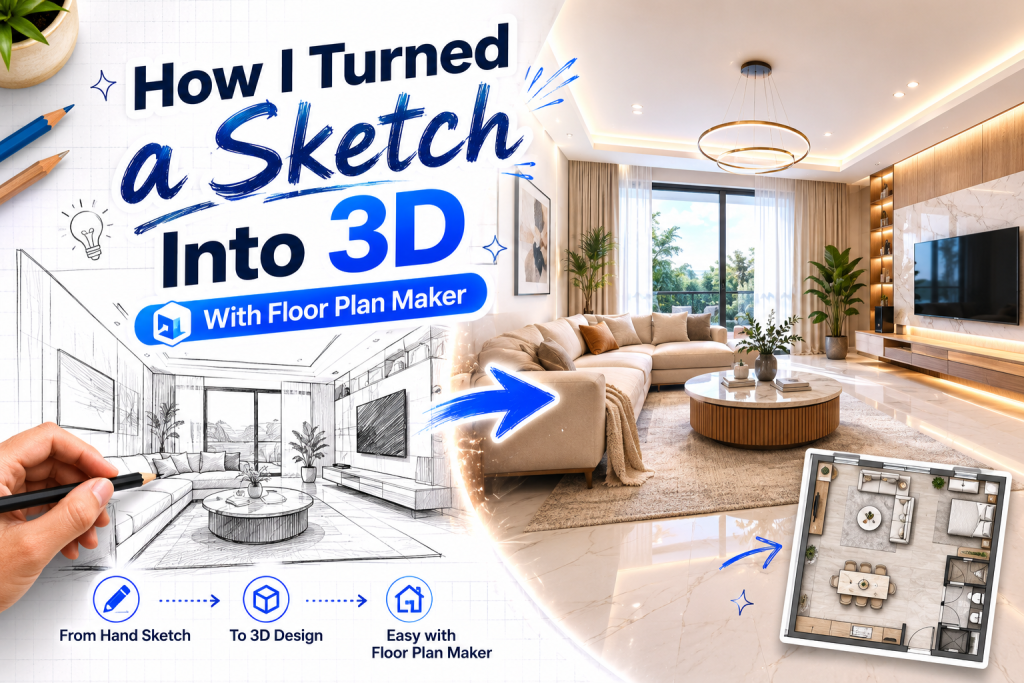
turn a sketch into 3d
Most design ideas don’t start in software. They start on paper, usually as messy sketches that are more about thinking than drawing. A few lines for walls, rough rectangles for furniture, arrows for movement—it’s rarely precise, but it captures intent.
The real challenge begins when you try to turn that sketch into something usable.
That gap between “idea on paper” and “structured digital layout” is where most workflows break.
In this case, I tested whether Floor Plan Maker could reduce that gap—not just by redrawing the sketch, but by turning it into a usable 3D spatial model.
The Starting Point: A Rough, Unfinished Sketch
The original sketch was extremely simple:
- a rectangular room
- a few furniture blocks
- a loosely defined entrance
- no precise measurements
It wasn’t meant to be accurate. It was meant to represent intent.
Traditionally, converting this into a digital model would require:
- manual tracing
- scaling adjustments
- object placement from scratch
- repeated alignment corrections
That process alone can take hours, even for simple layouts.
Step 1: Interpreting the Sketch, Not Copying It
The first thing that changed when using Free Floor Plan Maker was the mindset.
Instead of trying to replicate every line exactly, the process started with interpretation.
We focused on:
- what each shape represented
- how space was intended to be used
- which elements were structural vs flexible
For example:
- a rough rectangle became a desk zone
- a shaded area became circulation space
- an unclear block became a flexible activity area
This shift from “copying geometry” to “understanding intent” made the transition smoother.
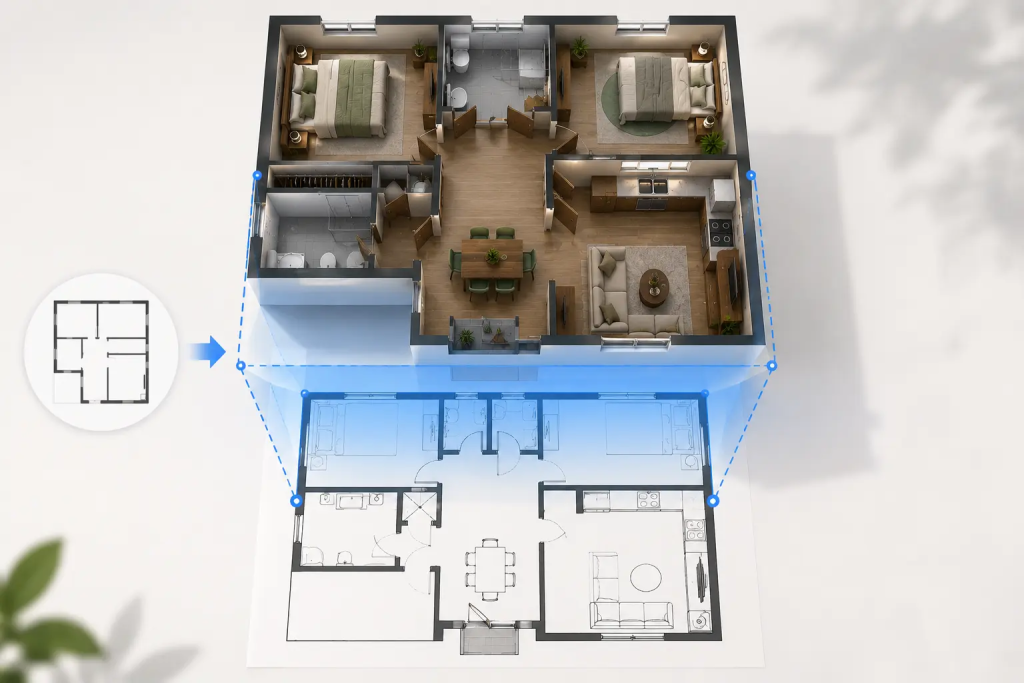
Step 2: Converting 2D Structure Into a Functional Layout
2D to 3D layout
Once the sketch intent was interpreted, Floor Plan Maker was used to rebuild the layout digitally.
Instead of manually drawing everything, the tool helped establish:
- room boundaries
- basic zoning
- furniture placement logic
- movement paths
What stood out here was speed.
What normally takes multiple manual steps was reduced to structural assembly:
- define space
- assign zones
- adjust layout
At this stage, the output was still 2D, but already significantly more structured than the original sketch.
Step 3: From Flat Layout to 3D Visualization
The most noticeable transformation happened when switching to 3D mode inside Floor Plan Maker.
The flat sketch suddenly became spatial:
- walls gained height
- furniture gained proportion
- circulation became visible
- depth replaced abstraction
What was previously a conceptual diagram became a navigable space.
The interesting part was not the rendering itself, but how it changed perception.
In 2D, the layout felt uncertain.
In 3D, problems became obvious.
For example:
- one area felt visually crowded
- another felt underutilized
- circulation paths that looked fine in 2D felt awkward in 3D
This is where spatial understanding becomes more concrete.
Step 4: Adjusting Based on Spatial Reality
After seeing the 3D version, several adjustments were made directly inside Floor Plan Maker:
- widened key movement paths
- repositioned furniture clusters
- adjusted spacing between functional zones
What was important here is that changes were no longer theoretical.
They were based on spatial perception rather than assumptions.
This feedback loop—2D → 3D → adjustment—became the most valuable part of the process.
Why Sketch-to-3D Matters More Than It Seems
At first glance, converting a sketch into 3D feels like a visualization feature.
But in practice, it changes how decisions are made.
Traditional workflow:
- sketch → redraw → adjust → visualize
AI-assisted workflow with Floor Plan Maker:
- sketch → interpret → generate → refine in 3D
The difference is not just speed. It is continuity.
You no longer lose intent between stages.
The Real Bottleneck Was Never Drawing
One surprising realization was that drawing was never the real problem.
The real bottleneck was translation:
- from idea → structure
- from structure → space
- from space → understanding
Each step traditionally introduces distortion.
With Floor Plan Maker, that distortion was reduced because interpretation and structure generation happen closer together.
What Changed After Seeing It in 3D
Once the sketch was fully converted and visualized, the design conversation changed completely.
Instead of asking:
- “Does this look right?”
We started asking:
- “Does this feel usable in space?”
That shift is important.
2D layouts often hide problems.
3D layouts expose them immediately.
Things that were unclear in sketch form became obvious:
- movement bottlenecks
- imbalance in spatial distribution
- unnecessary complexity in layout
Final Thought
Turning a sketch into a 3D model used to be a technical process dominated by manual work and software precision.
What Floor Plan Maker demonstrated is that the real value is not just visualization—it is continuity between intent and spatial reality.
A sketch is not a design.
A 3D model is not a solution.
The real value lies in how quickly you can move between them, test assumptions, and refine understanding of space.
And in that workflow, the tool becomes less about drawing and more about thinking in space.